There’s something truly magical about biting into a cool, creamy peppermint treat during the holidays, and this Festive Peppermint Patties Recipe brings that magic straight to your kitchen. These colorful, homemade mints melt in your mouth and are perfect for gifting or simply enjoying with a warm cup of cocoa.

Jump to:
Why You'll Love This Recipe
I’ve made peppermint patties many times, but this Festive Peppermint Patties Recipe really stands out because it’s vibrant, fun, and easy to customize. It’s a holiday classic with a twist that anyone can tackle!
- Fun and Festive Colors: Using red, green, and white dough gives these patties a joyful, holiday vibe that instantly cheers up the table.
- Simple Ingredients: You probably have most of these pantry staples, so no last-minute running to the store needed!
- Perfect Texture: The cream cheese and butter create soft, creamy patties that aren’t too sticky or stiff—just the right bite every time.
- Great for Gifting: These candies store well, so you can make a big batch ahead and share the holiday spirit with friends and family.

Ingredients & Why They Work
Each ingredient in this Festive Peppermint Patties Recipe plays a vital role in achieving the perfect texture, flavor, and color. Let me walk you through why these are my go-to choices and what to look out for when shopping.

- Granulated sugar: Helps coat the candies for a little extra sweetness and a subtle crunch – just remember to toss the patties well to get that perfect sugar dusting.
- Cream cheese: Adds creaminess and gives the peppermint patties a luscious melt-in-your-mouth texture, so make sure it's at room temperature for easy mixing.
- Unsalted butter: Round out the flavor and buttery softness without overpowering the peppermint.
- Light/clear corn syrup: Keeps the mixture smooth and prevents crystallization, which means your candies stay perfectly tender and not grainy.
- Peppermint extract: The star of the show! Use high-quality peppermint extract for that refreshing, bright kick.
- Powdered sugar: Gives structure to the dough and balances the moisture, creating that perfectly pliable texture you’ll love working with.
- Liquid food coloring: Red and green drops bring the festive flair. I personally prefer gel coloring sometimes—they’re more vibrant and don’t add extra moisture.
Make It Your Way
One of the best things about this Festive Peppermint Patties Recipe is how easy it is to customize. I love playing with different colors or even adding a little vanilla extract along with peppermint for a subtle twist. Feel free to make these your own!
- Variation: Last year, I made a batch with just peppermint and added crushed candy canes into the sugar coating for extra crunch—everyone adored that festive surprise.
- Dietary Mods: You can swap the butter for a plant-based spread to make these dairy-free, though the texture will slightly change—still delicious!
- Color Choices: Try using blue and white for a winter wonderland theme if you want to switch things up beyond traditional Christmas colors.
Step-by-Step: How I Make Festive Peppermint Patties Recipe
Step 1: Whip Up the Creamy Base
Start by lining a baking tray with parchment paper—you’ll need this when shaping your candies. Grab a large mixing bowl and beat your room-temperature cream cheese, butter, corn syrup, and peppermint extract together on low speed for about a minute until the mix is smooth. It’s important that the cream cheese and butter are soft so they combine beautifully without lumps.
Step 2: Incorporate the Powdered Sugar
Now slowly add your powdered sugar — about a half cup at a time — keeping your mixer on low speed. It’ll get thick quickly, so switch to a spatula or your hands to finish mixing once the dough is too dense for the mixer to handle. This step is key, don’t rush it, as it creates that perfect chewy-but-soft consistency.
Step 3: Divide and Color the Dough
Turn your dough out onto a sugar-dusted piece of parchment paper. Divide it into three equal parts. Make a shallow well in two of them and add your red food coloring to one, green to the other. Leave the last white for that classic peppermint look. Knead each colored dough ball with a little extra powdered sugar until the color is fully blended and the dough isn’t sticky. Trust me, adding sugar slowly here makes all the difference in texture!
Step 4: Roll, Slice, and Shape Your Patties
Next, roll each dough ball into an 18-inch rope about one inch thick. Slice the ropes into half-inch pieces, then gently roll each piece into a ball. Toss those balls with granulated sugar and arrange them on your baking tray. Make sure each patty gets that beautiful striped fork pattern on top—it adds a festive touch that’s just so charming!
Step 5: Let Your Mints Set
This last step requires patience but it’s worth it: leave the patties out at room temperature to dry and set for up to 24 hours. This drying time helps them hold their shape and develop the perfect chew. I often make mine a day ahead to have them ready for a holiday party or last-minute gifts.
Top Tip
From my experience making this Festive Peppermint Patties Recipe, mastering the dough's texture is the secret to success. Here's what I’ve learned along the way:
- Slowly Add Powdered Sugar: Don’t dump all the powdered sugar at once—adding it gradually helps you control the dough’s consistency so it’s soft but not sticky.
- Room Temperature Ingredients: Using softened cream cheese and butter ensures your mixture blends smoothly and prevents lumps that can throw off texture.
- Coloring Caution: Add liquid food coloring carefully; too much can make dough sticky. Gel colors work great if you want vibrant hues without extra moisture.
- Let the Patties Set: Patience with drying makes all the difference—don’t skip the resting time or your patties might be too soft to handle.
How to Serve Festive Peppermint Patties Recipe

Garnishes
When I’m serving these peppermint patties, I like to sprinkle a few crushed candy canes or finely chopped fresh mint leaves around the platter for extra color and aroma. A light dusting of powdered sugar on top also adds a snowy, festive look that guests love.
Side Dishes
These mints pair beautifully with warm drinks like hot chocolate, mulled wine, or spiced cider. I also like setting them next to my Christmas cookies or fudge for an irresistible holiday dessert spread.
Creative Ways to Present
For holiday parties, I’ve wrapped individual patties in clear cellophane tied with red and green ribbons. Another favorite is stacking them in mini mason jars, layered by color, which makes a delightful edible gift. They also look fabulous arranged on a festive platter with some holly sprigs or pinecones.
Make Ahead and Storage
Storing Leftovers
I keep leftover peppermint patties stored in an airtight container in the fridge to keep them fresh and firm. This recipe lasts beautifully for up to two weeks chilled — which is perfect for enjoying slowly across the holidays or gifting in batches.
Freezing
Freezing works great for these mints! Just store them in a freezer-safe container, separated with parchment paper so they don’t stick together. When you’re ready to enjoy, thaw them in the fridge overnight to keep their texture intact.
Reheating
No reheating needed here, thankfully! These peppermint patties are best served chilled or at room temperature. If they feel a bit firm from the fridge, just let them sit out for 10 minutes before enjoying.
Frequently Asked Questions:
Absolutely! Gel food coloring works wonderfully and provides vibrant colors without making the dough too sticky.
While you can leave them at room temperature for setting, storing peppermint patties in an airtight container in the fridge helps keep them fresh longer and maintains their firmness.
When refrigerated, these peppermint patties stay fresh for up to two weeks. Freezing can extend their shelf life to about three months.
Yes! You can mix in vanilla, almond, or even citrus extracts to create your own festive twist on the classic peppermint flavor. Just start with small amounts and adjust to taste.
Final Thoughts
This Festive Peppermint Patties Recipe holds a special place in my heart every holiday season. It’s simple enough to make with kids, beautiful enough for gifting, and just delicious enough to keep you sneaking back for one more. Give it a try—you’ll be glad you did, and it just might become your go-to treat too!
Print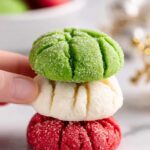
Festive Peppermint Patties Recipe
- Prep Time: 15 minutes
- Cook Time: 0 minutes
- Total Time: 1 hour 15 minutes
- Yield: 100 servings
- Category: Dessert
- Method: No-Cook
- Cuisine: American
Description
These Christmas Mints are delightful peppermint-flavored candies made with cream cheese, butter, corn syrup, and vibrant food coloring. They are sweet, creamy, and perfect for holiday gifting or festive parties. The candies are shaped into colorful discs with a signature striped pattern made by a fork, and they need to set for up to 24 hours for the best texture.
Ingredients
Main Ingredients
- ⅓ cup granulated sugar
- 4 ounces cream cheese room temperature
- 2 tablespoons unsalted butter room temperature
- 2 tablespoons light/clear corn syrup (Karo brand recommended)
- 1 teaspoon peppermint extract
- 4¼ cups powdered sugar divided
- 6 drops green liquid food coloring
- 6 drops red liquid food coloring
Instructions
- Prepare baking tray: Line a large rimmed baking tray with parchment paper. Place the granulated sugar into a small bowl and set aside for coating the candies later.
- Mix wet ingredients: In a large mixing bowl, beat together the cream cheese, unsalted butter, light corn syrup, and peppermint extract on low speed for 1 minute until smooth.
- Add powdered sugar: Slowly add 4¼ cups powdered sugar in ½ cup increments to the mixture with the mixer on low. When dough becomes too thick, use a spatula or wooden spoon to finish mixing by hand.
- Dough handling: Transfer dough onto a parchment paper sprinkled with ¼ cup powdered sugar. Divide dough into three equal parts. Make a shallow well in two parts and add red food coloring to one, green food coloring to the other, leaving the third part white.
- Knead colored doughs: Knead each colored dough ball to evenly distribute colors, adding up to ¼ cup additional powdered sugar as needed to reduce stickiness. Knead white dough slightly with a small amount of powdered sugar if needed.
- Form ropes: Roll each colored dough ball into an 18-inch long rope about 1 inch thick.
- Slice ropes: Cut each rope into ½-inch slices until fully sliced.
- Shape candies: Roll each slice into a small ball using the palm of your hand. Set aside.
- Coat candies: Toss 2-3 balls at a time in granulated sugar until fully coated and place them on the prepared baking tray.
- Flatten candies: Use the tines of a fork to gently press each coated dough ball into a flat disc, creating a striped pattern on top.
- Dry candies: Let the peppermint patties sit at room temperature on the tray for up to 24 hours to dry and set.
Notes
- Yields approximately 100 peppermint candies.
- Store in an airtight container in the refrigerator for up to 2 weeks to keep fresh.
- For longer storage, freeze in a freezer-safe container for up to 3 months; thaw in the refrigerator before serving.
- To achieve a deeper color, you can add up to ½ teaspoon of liquid food coloring.
- Adjust powdered sugar amount as needed for correct dough consistency—avoid too stiff or sticky dough.
- Gel food coloring is recommended as it provides vibrant colors without adding moisture and is safe for nut allergy sufferers.
Nutrition
- Serving Size: 1 candy
- Calories: 30 kcal
- Sugar: 4 g
- Sodium: 10 mg
- Fat: 1.2 g
- Saturated Fat: 0.7 g
- Unsaturated Fat: 0.4 g
- Trans Fat: 0 g
- Carbohydrates: 5 g
- Fiber: 0 g
- Protein: 0.3 g
- Cholesterol: 5 mg


Leave a Reply