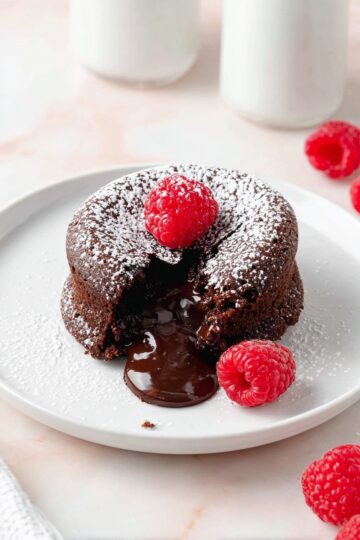
If you love the classic combo of chocolate and peanut butter, you’re going to flip for this Peanut Butter Chocolate Lava Cakes Recipe. Picture warm, rich chocolate cake that oozes molten goodness with a creamy peanut butter surprise right in the center — pure magic!

Jump to:
- Why You'll Love This Recipe
- Ingredients & Why They Work
- Make It Your Way
- Step-by-Step: How I Make Peanut Butter Chocolate Lava Cakes Recipe
- Top Tip
- How to Serve Peanut Butter Chocolate Lava Cakes Recipe
- Make Ahead and Storage
- Frequently Asked Questions:
- Final Thoughts
- Peanut Butter Chocolate Lava Cakes Recipe
Why You'll Love This Recipe
I’ve made countless lava cakes, but introducing peanut butter as a molten center took these to a whole new level. It’s a dessert that feels fancy but comes together surprisingly quickly — perfect for impressing guests or indulging on a quiet night.
- Decadently gooey centers: Enjoy molten chocolate with a creamy peanut butter surprise melting in every bite.
- Simple ingredients: You probably have most of these in your pantry already, so little prep is needed.
- Quick bake time: Ready from start to finish in just 35 minutes—perfect for spontaneous dessert cravings.
- Customizable servings: Serve solo or amp it up with ice cream and drizzles of melted peanut butter or chocolate syrup.
Ingredients & Why They Work
When it comes to these lava cakes, quality matters—especially the chocolate and peanut butter. Using a reliable commercial creamy peanut butter keeps the filling smooth and melty, while high-quality semi-sweet chocolate delivers that rich, deep cocoa flavor.
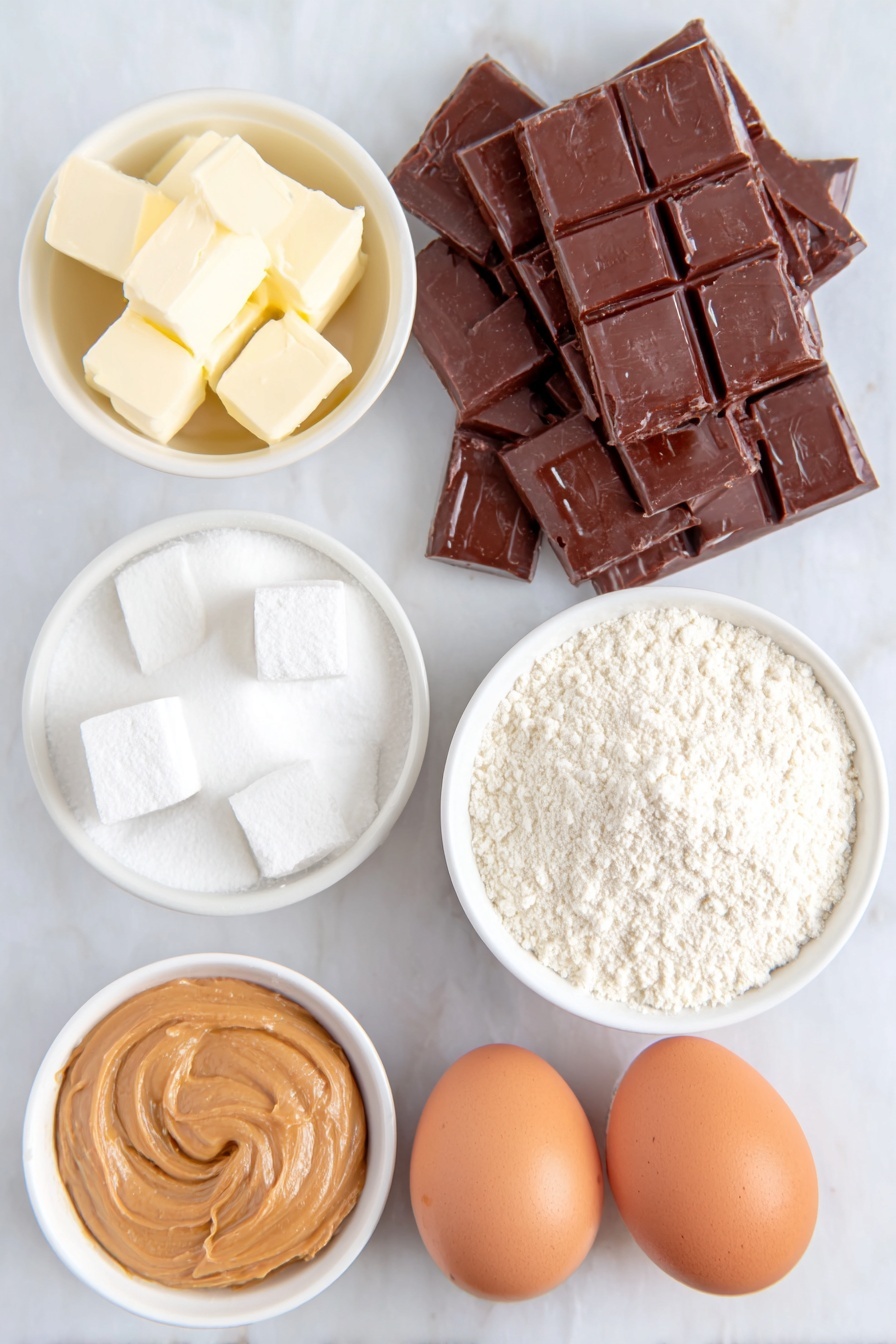
- Semi-sweet chocolate: Provides the perfect balance of sweetness and cocoa depth, essential for that molten lava effect.
- Unsalted butter: Adds richness and helps create a beautifully tender crumb in the cake.
- All-purpose flour: Gives structure without weighing down the cake, ensuring the center stays gooey.
- Confectioners’ sugar: Sweetens gently and helps with a smooth batter texture.
- Salt: Enhances all the flavors, balancing the sweetness and deepening the chocolate and peanut butter notes.
- Large eggs and egg yolks: Provide richness, moisture, and help bind everything together.
- Creamy peanut butter: Creates that luscious, creamy swirl inside; commercial creamy brands like Jif or Skippy work best here.
- Optional toppings: Ice cream, melted peanut butter, or chocolate syrup add a decadent final touch if you want to go all out.
Make It Your Way
The beauty of this Peanut Butter Chocolate Lava Cakes Recipe is how easily you can make it your own. Whether you want to tweak the flavors or add some personal flair, there are plenty of ways to customize this indulgent dessert to suit your taste buds or occasion.
- Classic Chocolate Lover’s Delight: If you prefer an ultra-rich molten chocolate center without the peanut butter, simply skip that step. I’ve made this version multiple times for guests who prefer pure chocolate — still decadent and just as gooey!
- Peanut Butter Swap: Use creamy commercial peanut butter brands like Jif or Skippy for the perfect melt and flavor. I once tried natural peanut butter here, but it became grainy and separated – so stick to the creamy, classic options.
- Muffin Pan Version: Don’t have ramekins? No worries. I’ve baked these in a greased, cocoa-dusted muffin pan. You’ll get six smaller lava cakes baked for about 8-10 minutes at the same 425°F (218°C). Super convenient and equally satisfying.
- Serving Style Variations: Try topping your cake with a scoop of vanilla ice cream, a drizzle of melted peanut butter, or a splash of chocolate syrup. It’s my go-to way to add texture and extra flavor contrasts.
- Diet-Friendly Swap: Although this recipe is already vegetarian, you could try substituting gluten-free flour to accommodate dietary needs. The texture might change slightly, but it’s worth experimenting!
Step-by-Step: How I Make Peanut Butter Chocolate Lava Cakes Recipe
Step 1: Prep Your Ramekins for Easy Cake Release
Start by generously spraying four 6-ounce ramekins with nonstick cooking spray. Then dust them lightly with cocoa powder to create a nonstick surface. This little extra step makes a big difference when you invert your cakes later—the edges come away smoothly, leaving you with flawless molten cakes every time. I like to shake out any excess cocoa powder so the cakes don’t get a bitter taste.
Step 2: Preheat Your Oven to 425°F (218°C)
While prepping the rest of your ingredients, set your oven to 425°F (218°C). This high heat is key for creating that perfect outer cake while keeping the center deliciously molten. I usually get this going right away so the oven is ready when my batter is mixed and the ramekins are filled.
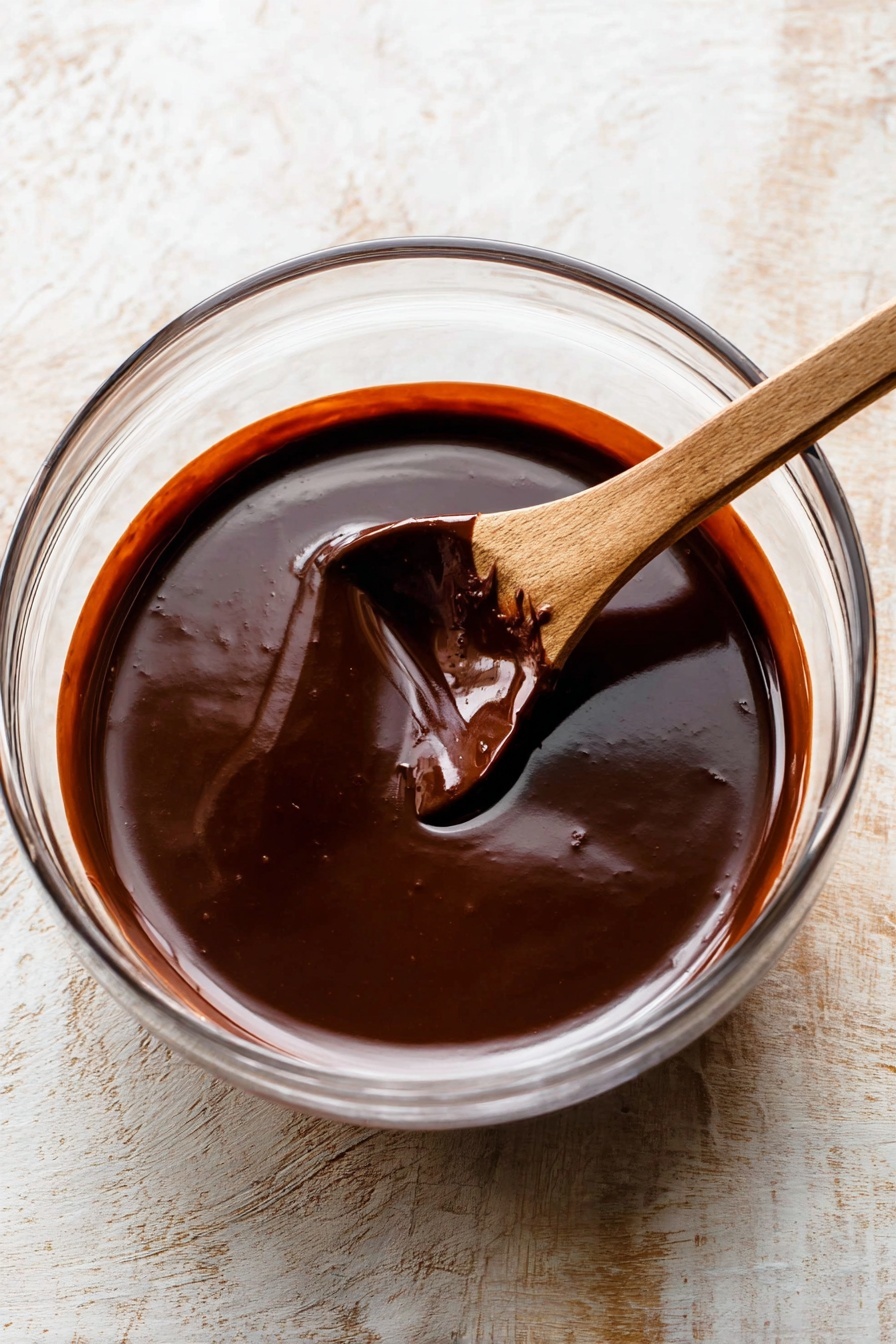
Step 3: Melt Chocolate and Butter Until Silky Smooth
Coarsely chop 6 ounces of semi-sweet chocolate—that way it melts quickly and evenly. Place the butter in a medium heat-proof bowl, add the chopped chocolate on top, and microwave on high in 10-second bursts. After each burst, stir thoroughly until the mixture is completely smooth and glossy. This silky blend is the luxurious base of your lava cakes! Set it aside to cool slightly before moving on.
Step 4: Whisk Dry Ingredients Together
In a small bowl, whisk together ¼ cup of flour, ½ cup confectioners’ sugar, and a pinch of salt. This dry mix will balance the sweetness and add structure to your batter. Whisk them until blended, so they’re ready to combine seamlessly with the wet ingredients.
Step 5: Blend Eggs and Yolks Smoothly
Beat 2 large eggs and 2 large egg yolks together in a separate bowl until smooth and well combined. This step ensures an even texture and richness. The eggs will bring the lava cakes to life with their structure and tenderness.
Step 6: Gently Combine All Ingredients to Form Batter
Slowly add your dry flour mixture and eggs into the melted chocolate bowl. Using a silicone spatula or wooden spoon, gently fold everything together until there are no lumps left. If you spot any stubborn lumps, a quick whisk will smooth them right out. The batter should be a bit thick but silky, the perfect consistency for spooning into your ramekins.
Step 7: Fill Ramekins and Add Peanut Butter Surprise
Spoon the chocolate batter evenly into your prepared ramekins. Then add about 2 teaspoons of creamy peanut butter on top of each. Gently press the peanut butter down into the batter to nestle it in nicely. Don’t worry if some peanut butter remains visibly on the surface—that molten peanut butter surprise is what makes these lava cakes unforgettable!
Step 8: Bake Until Just Set with Gooey Center
Place the filled ramekins on a baking sheet and pop them in the preheated oven for 12-13 minutes. You’ll notice the sides turn firm and set, while the top stays slightly soft and delicate. Keep an eye here—overbaking means losing the lava effect, so trust the time and cues rather than your nose alone.
Step 9: Cool Slightly, Invert, and Release the Cakes
Let the cakes cool for 1 minute once out of the oven—just enough so they’re safe to handle but still warm and molten in the center. Cover each ramekin with an inverted plate, use oven mitts to protect your hands, then flip carefully to release the cake onto the plate. The cocoa dusting should help them slide right out effortlessly.
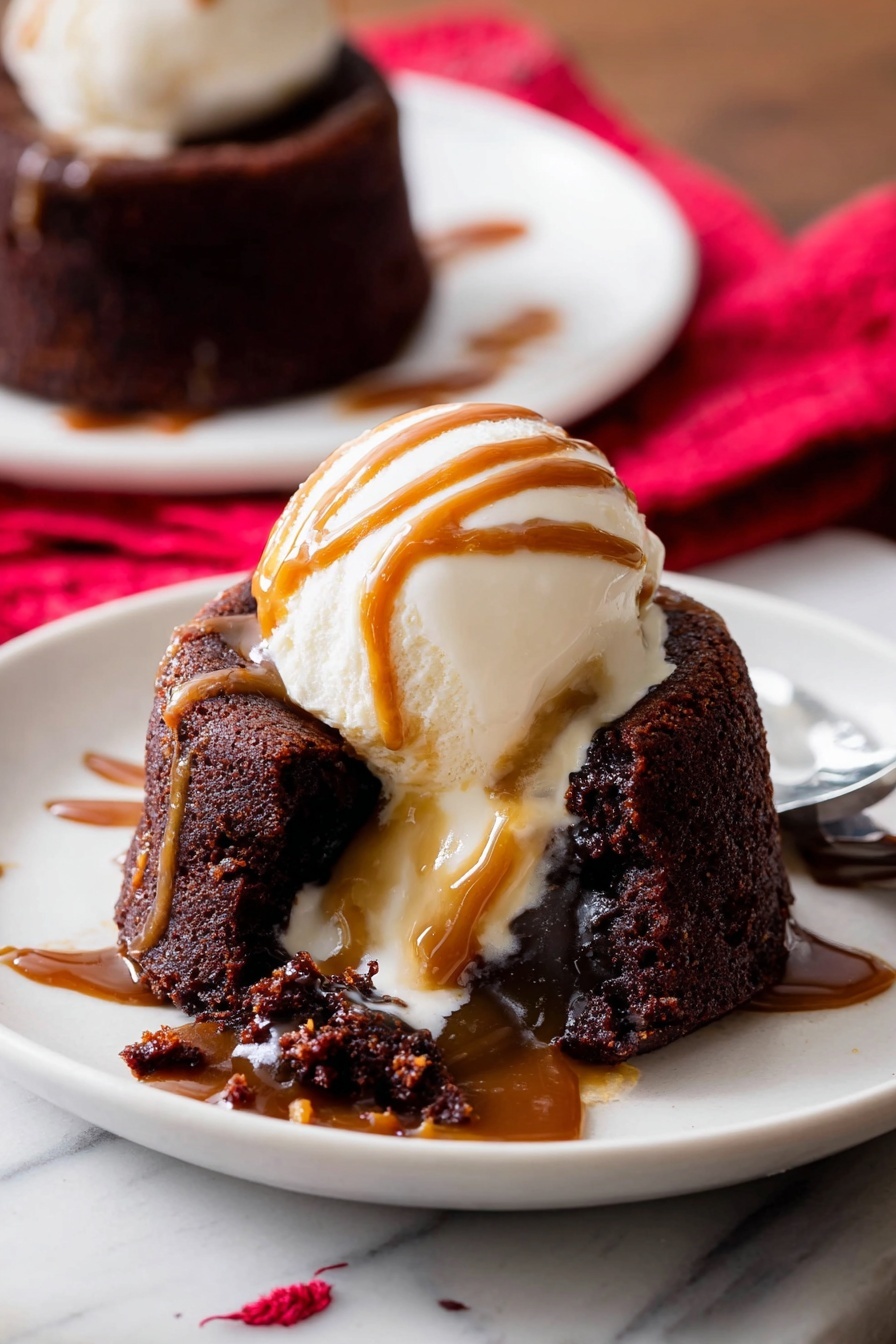
Step 10: Serve Immediately with Your Favorite Toppings
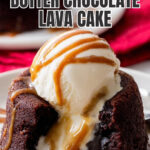
These lava cakes are best enjoyed warm, right out of their molds. Serve them with a scoop of vanilla ice cream, drizzle melted peanut butter or chocolate syrup on top, or both if you’re feeling extra indulgent. The combination of warm cake, molten peanut butter, and cold ice cream is a match dreamed for dessert lovers everywhere!
Top Tip
Getting these Peanut Butter Chocolate Lava Cakes just right is easier than you might think with a few insider tips. These pointers have helped me achieve that perfect molten center every time, so you can savor pure gooey delight without any fuss.
- Perfect Ramekin Prep: Dust your ramekins thoroughly with cocoa powder after spraying. This extra step ensures your cakes slip out smoothly without any sticking, preserving that beautiful molten center.
- Timing is Everything: Keep a close eye on baking time—12 to 13 minutes is ideal. Too long and the lava firms up; too short and it won’t set enough. I always set a timer and peek through the oven window.
- Use the Right Peanut Butter: Commercial creamy peanut butter like Jif or Skippy works best. Natural or crunchy peanut butter can alter the texture, making the molten surprise less smooth and luscious.
- Cool Briefly Before Inverting: One minute after baking is just enough to let the cake set without losing its molten magic inside. I’ve found that rushing this step can cause the cake to break, so patience pays off here.
How to Serve Peanut Butter Chocolate Lava Cakes Recipe
Garnishes
To elevate your Peanut Butter Chocolate Lava Cakes even more, try topping them with a scoop of vanilla ice cream—its cool creaminess plays wonderfully against the warm cake. Drizzle melted peanut butter or chocolate syrup over the top for extra indulgence. Fresh berries or a sprinkle of flaky sea salt can also add a nice contrast in flavor and texture.
Side Dishes
A light, fresh side like a mixed green salad with a simple citrus vinaigrette can balance this rich dessert. Alternatively, serve with a robust cup of coffee or a sweet dessert wine to complement the peanut butter and chocolate flavors.
Make Ahead and Storage
Storing Leftovers
If you have any peanut butter chocolate lava cakes left over, store them tightly covered in the refrigerator for up to 2 days. Just keep in mind they’re best enjoyed fresh for that molten center experience.
Freezing
You can freeze unbaked lava cake batter in the ramekins covered with plastic wrap for up to 1 month. When ready to bake, let the batter thaw in the refrigerator overnight, then bring to room temperature before continuing with baking per the recipe instructions.
Reheating
Reheat refrigerated cakes gently in the microwave for 15-20 seconds to warm the center without overcooking the edges. Avoid overheating to maintain that gooey texture.
Frequently Asked Questions:
It’s best to stick with commercial creamy peanut butter like Jif or Skippy. Natural peanut butter is often oil-separated and less creamy, which can affect the molten center’s texture and consistency.
Look for firm and set edges with a slightly soft top. The cakes should still have a little jiggle in the center when you gently shake the baking sheet. Baking for 12 to 13 minutes at 425°F (218°C) usually hits the mark perfectly.
Absolutely! Simply omit the peanut butter, and bake the cakes for 12 to 13 minutes as stated. You’ll still get a rich molten chocolate center.
If you don’t have ramekins, use a muffin pan prepared with nonstick spray and cocoa powder. Bake 6 smaller cakes at 425°F (218°C) for 8-10 minutes. The texture and flavor will still be delicious!
Final Thoughts
This Peanut Butter Chocolate Lava Cakes Recipe truly hits the spot when you're craving a dessert that’s both rich and comforting—like a warm hug in cake form. Whether you’re serving it up for a special occasion or just treating yourself on a cozy night in, these little cakes impress every time with their luscious molten center and perfect peanut butter twist. Give these a try, and don’t forget to enjoy every gooey, chocolatey bite!
Print
Peanut Butter Chocolate Lava Cakes Recipe
- Prep Time: 15 minutes
- Cook Time: 13 minutes
- Total Time: 35 minutes
- Yield: 4 cakes
- Category: Dessert
- Method: Baking
- Cuisine: American
- Diet: Vegetarian
Description
Deliciously rich Peanut Butter Chocolate Lava Cakes featuring a molten chocolate center with a creamy peanut butter surprise. Perfect for an indulgent dessert that combines the best of chocolate and peanut butter in a gooey, warm cake.
Ingredients
Main Ingredients
- 6 ounces semi-sweet chocolate
- ½ cup unsalted butter (8 Tbsp, 113g)
- ¼ cup all-purpose flour (31g, spooned & leveled)
- ½ cup confectioners’ sugar (60g)
- ⅛ teaspoon salt
- 2 large eggs
- 2 large egg yolks
- 8 teaspoons creamy peanut butter (42g, about 2 teaspoons per cake)
Optional for Serving
- Ice cream
- Melted peanut butter
- Chocolate syrup
Instructions
- Prepare Ramekins: Spray 4 six-ounce ramekins with nonstick cooking spray and dust with cocoa powder. This prevents the cakes from sticking and ensures easy release.
- Preheat Oven: Preheat your oven to 425°F (218°C) to get it ready for baking the lava cakes.
- Melt Chocolate and Butter: Coarsely chop the chocolate. Place butter in a medium heat-proof bowl and add the chopped chocolate on top. Microwave on high in 10-second increments, stirring after each until the mixture is completely smooth. Set aside to cool slightly.
- Mix Dry Ingredients: In a small bowl, whisk together the flour, confectioners’ sugar, and salt until combined.
- Combine Eggs: In another small bowl, whisk the eggs and egg yolks together until smooth and combined.
- Combine All Ingredients: Slowly add the flour mixture and eggs into the melted chocolate bowl. Stir gently with a silicone spatula or wooden spoon until fully combined and smooth, eliminating any lumps gently with a whisk. The batter will be slightly thick.
- Fill Ramekins: Spoon the chocolate batter evenly into the prepared ramekins. Add 2 teaspoons of creamy peanut butter on top of each and gently press it down slightly into the batter. Some peanut butter may remain exposed.
- Bake: Place the ramekins on a baking sheet and bake for 12-13 minutes. The sides should look firm and set, while the top might remain slightly soft.
- Cool and Invert: Let the cakes cool for 1 minute after baking. Then cover each ramekin with a plate, invert carefully using oven mitts to avoid burns, and gently release the cakes onto the plates.
- Serve: Serve immediately with optional toppings like ice cream, melted peanut butter, or chocolate syrup for extra indulgence.
Notes
- Make Ahead: Prepare the batter through step 6, cover tightly, and refrigerate for up to 1 day. Bring to room temperature before continuing.
- Use commercial creamy peanut butter such as Jif or Skippy for best results; avoid natural, crunchy, or other nut butters.
- For plain lava cakes without peanut butter, omit the peanut butter and bake for 12-13 minutes.
- Use 6-ounce ramekins for accurate baking time; smaller or larger sizes may require adjusting bake time.
- If ramekins are unavailable, use a muffin pan greased and dusted with cocoa powder; bake 6 cakes at 425°F (218°C) for 8-10 minutes.
Nutrition
- Serving Size: 1 cake
- Calories: 480 kcal
- Sugar: 30 g
- Sodium: 120 mg
- Fat: 30 g
- Saturated Fat: 10 g
- Unsaturated Fat: 15 g
- Trans Fat: 0 g
- Carbohydrates: 45 g
- Fiber: 3 g
- Protein: 7 g
- Cholesterol: 150 mg


Leave a Reply