I’m so excited to share this delightful Strawberry Kiss Cookies Recipe with you today! These soft, funfetti sugar cookies are made even better with cream cheese in the dough and topped with those iconic Hershey’s Strawberry Ice Cream Cone Kisses. Honestly, they’re a playful, pink-flavored burst of happiness in every bite.

Jump to:
Why You'll Love This Recipe
I’ve made these cookies countless times, and every single time they bring smiles and sweet memories. If you’re looking for a cookie that’s easy to make, irresistibly soft, and colorful enough to brighten any occasion, these Strawberry Kiss Cookies are your new best friend.
- Soft and Tender Texture: The cream cheese adds a moist, tender crumb that makes these cookies melt in your mouth.
- Funfetti Fun: Bright sprinkles in the dough bring a cheerful, festive vibe perfect for celebrations or a simple treat.
- Strawberry Burst: Hershey’s Strawberry Ice Cream Cone Kisses deliver that classic fruity flavor you’ll love on top.
- Easy and Quick: Using a funfetti sugar cookie mix keeps things simple without sacrificing flavor or fun.
Ingredients & Why They Work
Gathering the right ingredients really sets you up for success here. The cream cheese brings richness and chewiness, while the funfetti cookie mix does a lot of the heavy lifting for flavor and texture. And of course, those famous strawberry-flavored Kisses tie everything together!
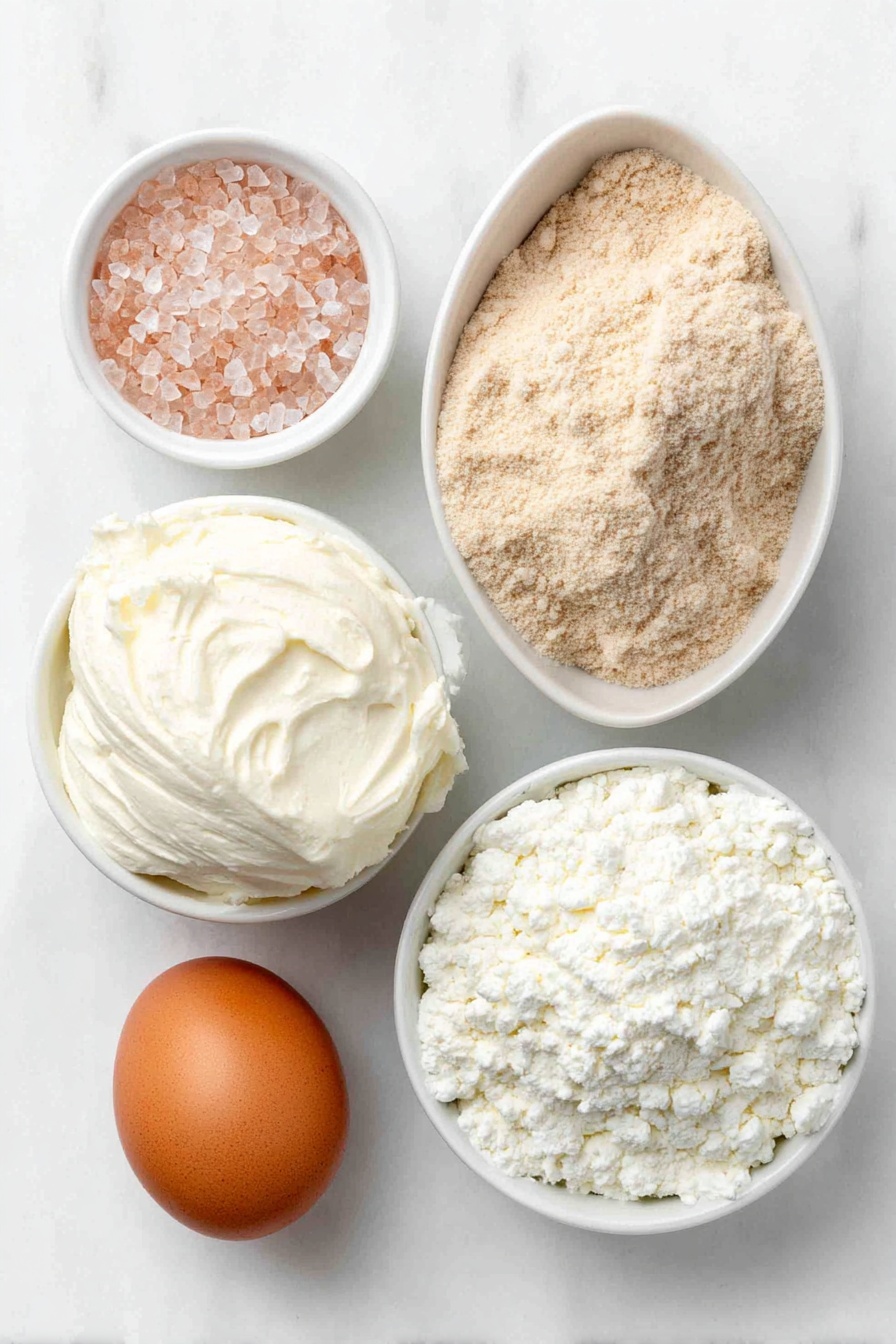
- Funfetti Sugar Cookie Mix: This mix gives you the classic sugar cookie base with those colorful sprinkles already included for a festive look and taste.
- Cream Cheese: Softened cream cheese adds a subtle tang and keeps the cookies soft and moist.
- Large Egg: The egg binds the ingredients and helps create that perfect soft cookie texture.
- Pink or White Sanding Sugar or Non-Pareils: These add a pretty, sparkly coating that makes the cookies extra fun and festive.
- Hershey’s Strawberry Ice Cream Cone Kisses: The star topping that melts slightly into the cookie, providing a burst of strawberry flavor with every bite.
Make It Your Way
The beauty of the Strawberry Kiss Cookies Recipe is just how versatile it can be! Feel free to play around with coatings, toppings, or chilling times to make these cookies uniquely yours. Whether you're baking for a party or just a sweet moment to yourself, these cookies adapt wonderfully.
- Variation: I once swapped the sanding sugar for colorful non-pareils when making these for a birthday bash—it added a delightful crunch and a whimsical look that everyone loved. The cream cheese keeps them tender as always, which is my favorite part!
- Dietary tweak: For those trying to avoid dairy, you could experiment with a vegan cream cheese alternative and egg replacer, though results will vary slightly from the original texture and flavor.
- Seasonal twist: Around Valentine’s Day, I stirred in a little freeze-dried strawberry powder into the dough to boost that strawberry vibe. It intensified the color and flavor, making the cookies feel even more festive.
Step-by-Step: How I Make Strawberry Kiss Cookies Recipe
Step 1: Prep Like a Pro
Start by lining a large baking sheet with parchment paper to ensure your cookies don’t stick and are easy to clean up after. Then preheat your oven to a toasty 375 degrees Fahrenheit—getting the oven hot before you bake means your cookies will bake evenly and come out just right.
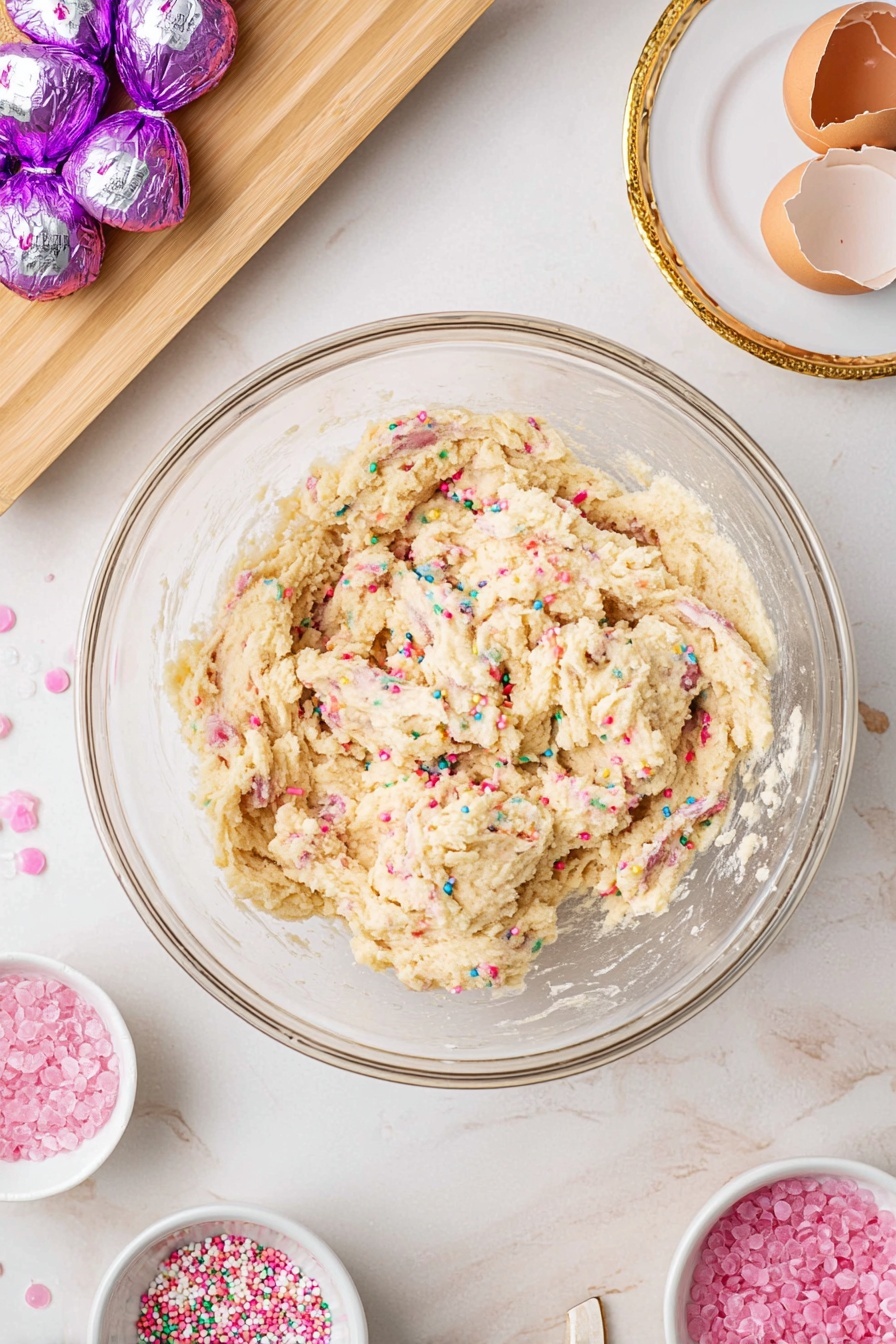
Step 2: Whip up the Dough
In a large bowl, beat together the funfetti sugar cookie mix, softened cream cheese, and one large egg. I use a hand mixer for this—beating the ingredients until a soft, smooth dough forms. You want to make sure everything is fully combined, but avoid overmixing so the cookies stay tender.
Step 3: Sugar-Coat Those Dough Balls
Pour your choice of pink or white sanding sugar, or non-pareils, into a shallow bowl. Using a 1 ½ tablespoon cookie scoop, portion out the dough and drop each ball into the sugar. Gently roll to coat and shape into a smooth ball. If your dough feels too sticky to handle easily, pop it in the fridge or freezer for 30-60 minutes. This optional step makes shaping much neater and easier, but the dough is still manageable without chilling.
Step 4: Arrange and Bake
Space your sugar-coated dough balls about 1 ½ inches apart on your prepared baking sheet so they have room to spread as they bake. Slide them into the preheated oven and bake for 12 minutes, or until the edges look set but the centers remain soft. The smell around your kitchen will be irresistible about now!
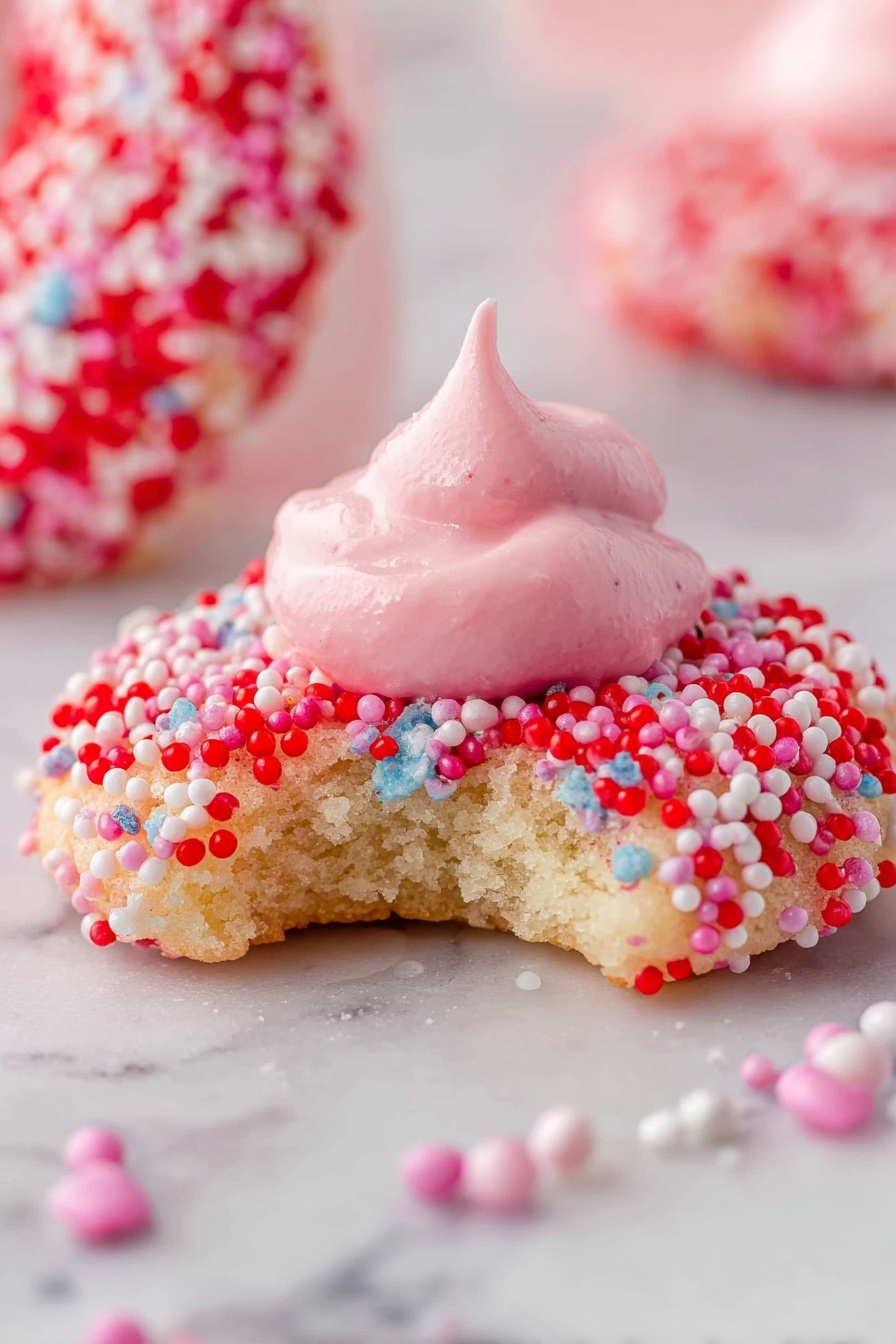
Step 5: Add the Signature Kiss
Once baked, let the cookies cool on the sheet for 3-5 minutes—just enough time for them to set but still be warm enough to gently press one unwrapped Hershey’s Strawberry Ice Cream Cone Kiss into the center top of each cookie. This step is magical, giving you that iconic look along with a burst of luscious strawberry flavor.
Step 6: Cool Completely or Enjoy Warm
Transfer the cookies to a wire rack to cool completely if you want the Kisses to retain their shape. Or, if you prefer a melty, gooey strawberry center, serve them warm right away. Either way, these cookies are hard to resist!


Leave a Reply