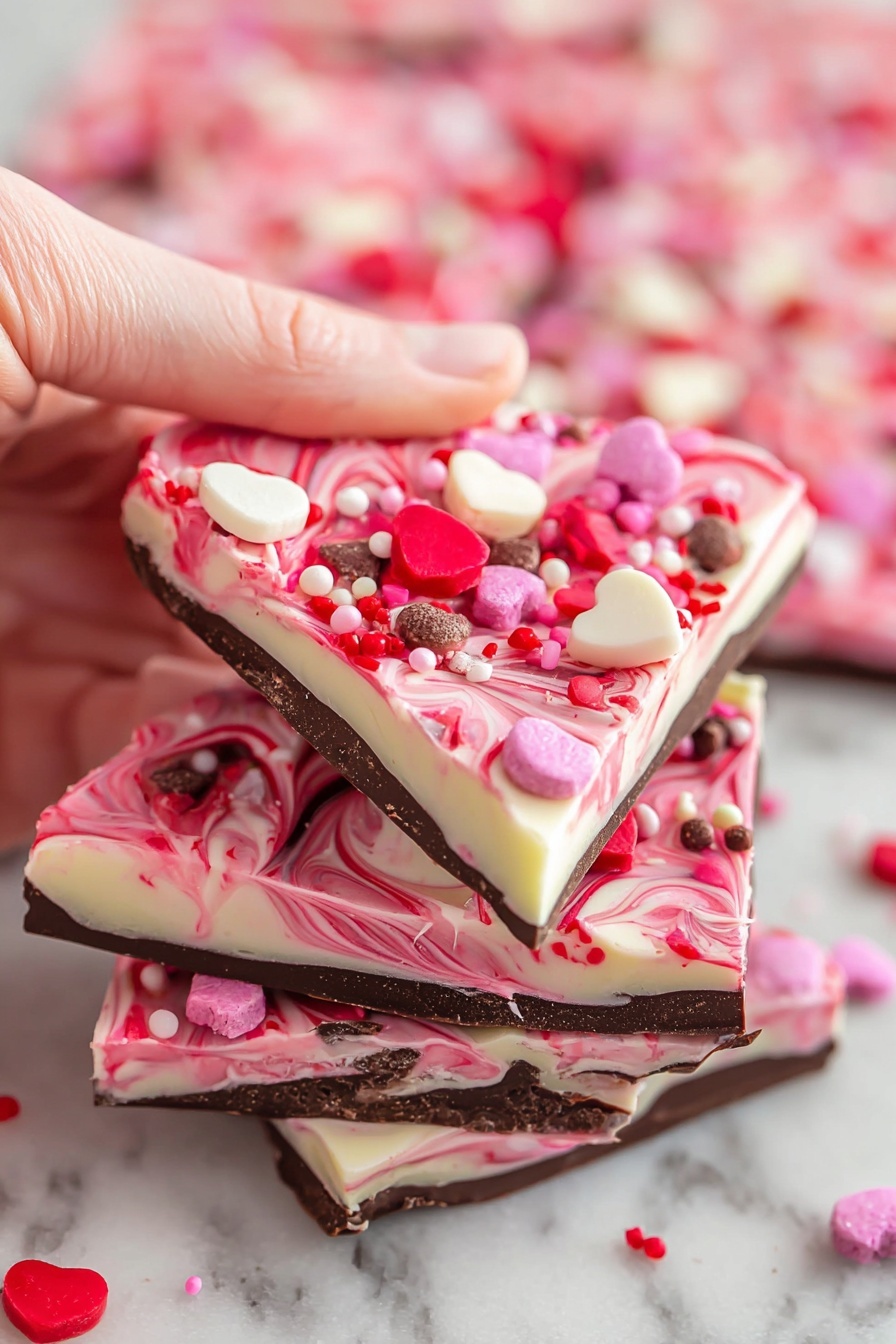
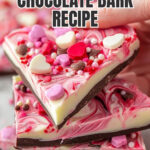
Nothing says sweet love like a homemade treat, and this Valentine’s Day Chocolate Bark Recipe is exactly that — layers of creamy, rich, and colorful chocolate perfect for celebrating the day. Trust me, once you make this, you’ll want to share it with everyone you love (or keep it all to yourself!).

Jump to:
Why You'll Love This Recipe
I’m always looking for something that’s festive but totally doable — this recipe fits the bill perfectly. The combination of dark and white chocolate with a splash of pink candy melts makes it as stunning as it is delicious. Plus, it’s a breeze to whip up and so versatile.
- Festive Layers: Three gorgeous layers make this chocolate bark feel extra special and colorful for Valentine’s Day.
- Easy to Make: No fancy equipment needed—just your microwave and a baking sheet lined with parchment paper.
- Customizable Toppings: Use your favorite Valentine’s candies and sprinkles to make it truly your own.
- Perfect for Sharing or Gifting: Break into pieces for an adorable treat to hand out or enjoy with friends and family.
Ingredients & Why They Work
This recipe calls for some classic chocolate staples plus those fun pink candy melts that give it that Valentine’s pop. When shopping, look for good-quality chocolate chips and baking bars to get the best flavor and smoothest melt.
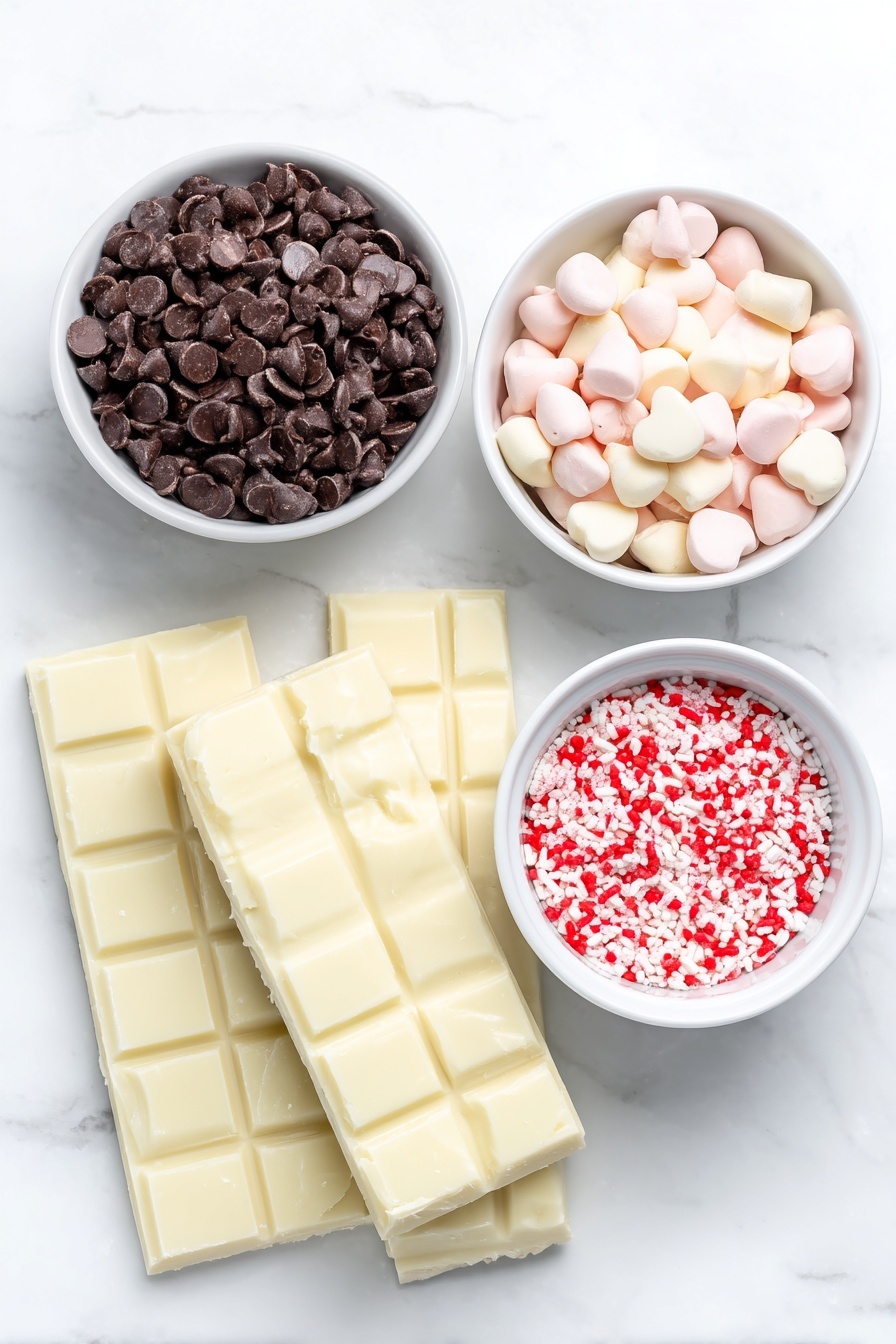
- Dark chocolate chips: They melt beautifully and form a rich, intense base layer.
- White chocolate baking bars: Their creamy texture contrasts perfectly with the dark chocolate for that classic bark look.
- Pink candy melts: These bring vibrant color and a smooth, sweet finish that's so festive.
- Valentine’s Day candy: Adds fun texture and extra sweetness on top—think hearts, mini M&Ms, or themed chocolates.
- Valentine’s Day sprinkles: Sprinkles give a lovely crunch and an extra hint of holiday cheer.
Make It Your Way
One of the best things about this Valentine’s Day Chocolate Bark Recipe is how easy it is to make it uniquely yours! Whether you love a little extra crunch or prefer to keep it simple and sophisticated, you can personalize your bark to suit your mood or gift recipient.
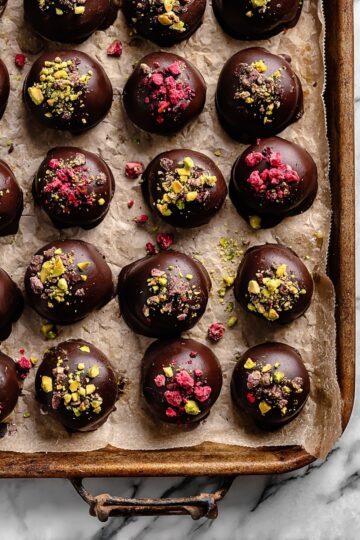
- Variation: For a nutty twist, I like sprinkling chopped pistachios or almonds on top instead of candy. It adds a lovely crunch and a subtle, earthy flavor that pairs beautifully with the chocolate layers.
- Dietary Friendly: To make this vegan-friendly, try substituting the white chocolate baking bars with a creamy vegan white chocolate alternative and ensure your candy melts and toppings are dairy-free.
- Seasonal Switch-Up: Swap out the Valentine’s themed candies and sprinkles for seasonal favorites—like pumpkin spice or peppermint pieces—to enjoy this treat year-round!
- Color Splash: Feel free to experiment with different colored candy melts. Maybe soft lavender for spring or festive green for St. Patrick’s Day to spread love in every season.
Step-by-Step: How I Make Valentine’s Day Chocolate Bark Recipe
Step 1: Prep Your Pan Like a Pro
Start by lining a half sheet baking pan with parchment paper, leaving yourself some extra overhang around the edges. This little trick makes it so easy to lift the bark out once it’s hardened—no scraping required! Set the pan aside while you get your chocolates ready.
Step 2: Melt the Dark Chocolate Smoothly
Place your dark chocolate chips in a microwave-safe bowl. Heat them for 30 seconds, then stir. Keep heating in short 15-20 second bursts, stirring thoroughly each time. This slow and steady approach prevents the chocolate from seizing and ensures a silky, glossy finish perfect for spreading.
Step 3: Spread and Set the Dark Chocolate Base
Pour the melted dark chocolate onto the parchment-lined pan. Using a spatula, spread it out evenly into a thin layer. You want it thin enough to get that delicate bark crispness but thick enough to hold your toppings. Let it sit for about 10 minutes until it’s mostly set but still a little tacky on top—that’s key for layering.
Step 4: Melt White Chocolate and Pink Candy Melts
Break the white chocolate baking bars into pieces and place them in a separate microwave-safe bowl. Heat for 30 seconds, stir, then continue in short increments until completely smooth. Repeat this melting process with the pink candy melts in another bowl. Be patient—heating slowly and stirring constantly is the secret to preventing lumps.
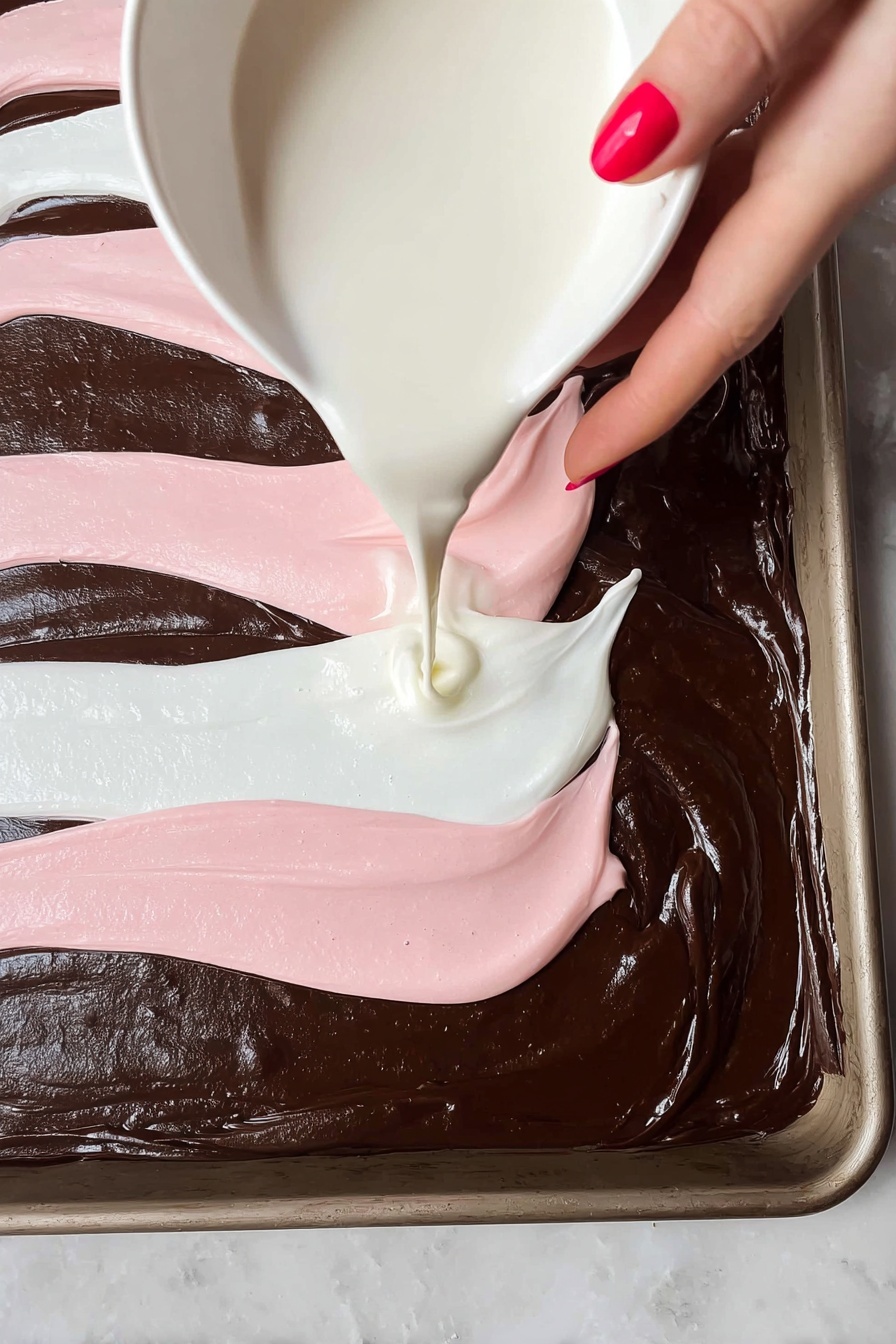
Step 5: Layer and Marble Your Chocolate Art
Pour the white chocolate layer evenly over the dark chocolate base and spread quickly, as it sets up fast. Immediately drizzle the melted pink candy melts on top before the white chocolate fully hardens. With a toothpick, gently swirl the pink and white layers to create a pretty marble effect, careful not to disturb the dark chocolate layer underneath.
Step 6: Sprinkle, Chill, and Enjoy
While the chocolate is still warm, sprinkle your Valentine’s Day candy pieces and sprinkles over the top, pressing lightly so they stick. Transfer the pan to a cool spot and let the bark chill for about 30 minutes until completely hardened. Then lift out using the parchment edges, break into pieces, and enjoy!
Top Tip
These tips come from baking this Valentine’s Day Chocolate Bark Recipe a few times and really helped me get that perfect balance of smooth layers and festive flair!
- Slow and steady melting: I’ve learned that heating the chocolates and candy melts in short bursts, stirring thoroughly, is key to preventing lumps or seizing. Patience makes all the difference.
- Layer timing matters: Making sure each layer is almost but not fully set before adding the next helps keep distinct colors and textures without them blending together.
- Use that parchment overhang: Leaving extra parchment paper hanging off the edges of your pan makes lifting out the hardened bark a breeze—no cracks or mishaps.
- Don’t rush the cooling: Giving the bark a full 30 minutes to harden ensures the pieces break cleanly and keeps your toppings beautifully in place.
How to Serve Valentine’s Day Chocolate Bark Recipe
Garnishes
While the colorful Valentine’s Day candy and sprinkles already add that perfect festive touch, you can elevate your presentation by adding a sprinkle of edible glitter or tiny heart-shaped sugar pearls for extra sparkle. For serving, place the bark on a pretty platter or wrap pieces individually in cellophane tied with a red or pink ribbon—ideal for gifting or party favors!
Side Dishes
This chocolate bark is a star dessert on its own, but if you want to pair it with something else, consider a light and refreshing berry salad, a scoop of vanilla ice cream, or even a warm cup of coffee or rich hot chocolate to complement the layers of dark, white, and pink chocolate.
Make Ahead and Storage
Storing Leftovers
You can store your Valentine’s Day Chocolate Bark in an airtight container at room temperature for 4-5 days. If you want it to last longer, keep it in the refrigerator where it stays fresh for up to 2 weeks. Just make sure it’s well sealed to avoid absorbing any fridge odors.
Freezing
For longer storage, freeze the bark in a freezer-safe container for up to 4 months. When you're ready to enjoy, thaw it overnight in the refrigerator to maintain that perfect texture and flavor.
Reheating
Since this is a no-bake chilled treat, it’s best enjoyed cold or at room temperature. If you want to soften it slightly, allow the pieces to sit out for 10–15 minutes before serving—avoid any direct heat, which could melt your beautiful layers and toppings.
Frequently Asked Questions:
Absolutely! Milk chocolate will create a sweeter and creamier base layer, but keep in mind it may affect the balance of flavors and the final texture slightly.
Heat your chocolate in short 15-20 second intervals in the microwave, stirring thoroughly after each. Avoid adding any water or moisture, and be patient to keep the chocolate smooth.
Yes! Feel free to swap out the Valentine’s-themed candies and sprinkles with nuts, dried fruit, or other candy of your choice to personalize your bark.
If layers merge, it usually means the chocolate wasn’t set enough before adding the next layer. Aim for mostly set layers to maintain distinct colors and textures.
Final Thoughts
Making this Valentine’s Day Chocolate Bark Recipe always brings a little extra joy into my kitchen—and I hope it does the same for you! It’s such a fun, colorful treat that’s simple to make but looks so impressive. Whether you’re sharing it with loved ones or gifting it, this bark delivers sweetness and charm in every bite. Enjoy every moment of making and savoring it!
Print
Valentine’s Day Chocolate Bark Recipe
- Prep Time: 10 minutes
- Chill Time: 45 minutes
- Cook Time: 10 minutes
- Total Time: 55 minutes
- Yield: 6 servings
- Category: Dessert
- Method: Melting and spreading chocolate layers are done using stovetop microwave technique but since microwaving is involved without actual stovetop pan cooking, and multiple layers are cooled on baking sheet, the primary method is Baking (final cooling on pan and setting).
- Cuisine: American
Description
A festive Valentine’s Day Chocolate Bark featuring layers of rich dark chocolate, creamy white chocolate, and vibrant pink candy melts, topped with colorful Valentine’s Day candies and sprinkles. Perfect for gifting or sharing during the holiday.
Ingredients
Chocolate Layers
- 1 ½ cups dark chocolate chips
- 12 ounces white chocolate baking bars (3 bars, 4 ounces each)
- ¾ cup pink candy melts
Toppings
- ¼ cup Valentine’s Day candy
- 2 tablespoons Valentine’s Day sprinkles
Instructions
- Prepare baking pan: Line a half sheet baking pan with parchment paper, leaving an overhang for easy removal, and set aside.
- Melt dark chocolate: In a microwave-safe bowl, heat the dark chocolate chips for 30 seconds, then stir well. Continue heating in 15-20 second increments, stirring thoroughly after each, until smooth and completely melted.
- Spread dark chocolate: Pour the melted dark chocolate onto the prepared parchment paper and spread into a thin, even layer with a spatula.
- Set partially: Allow the dark chocolate to set for about 10 minutes until mostly but not completely hardened.
- Melt white chocolate: Break white chocolate bars into pieces and place in a microwave-safe bowl. Heat for 30 seconds, stir, then continue heating in short increments while stirring until smooth and fully melted.
- Melt pink candy melts: In a separate microwave-safe bowl, heat the pink candy melts starting with 30 seconds, then in 15-20 second increments, stirring well until melted and smooth.
- Layer white chocolate: Pour the white chocolate evenly over the partially set dark chocolate layer and spread quickly, as it hardens rapidly.
- Drizzle pink candy melts: Before the white chocolate sets, drizzle the melted pink candy melts over the white chocolate layer.
- Create marble effect: Gently run a toothpick through the pink and white layers to create a marbled pattern, avoiding mixing with the dark chocolate layer.
- Add toppings: While the chocolate is still warm, sprinkle Valentine’s Day candy and sprinkles evenly over the top.
- Cool completely: Let the bark cool for 30 minutes or until fully hardened.
- Serve: Break or cut the chocolate bark into pieces and serve.
Notes
- Store bark in an airtight container at room temperature for 4-5 days or up to 2 weeks in the refrigerator.
- Freeze bark in a freezer-safe container for up to 4 months.
- Adjust serving size based on how large or small you break the bark pieces.
- Leave extra parchment paper overhang on the baking pan for easy removal of hardened bark.
- Heat chocolates slowly in increments to prevent seizing and ensure smooth melting.
- Allow each chocolate layer to be almost set before adding the next to avoid blending; for swirl effects, layers can be mixed intentionally.
Nutrition
- Serving Size: ⅙ batch
- Calories: 350 kcal
- Sugar: 30 g
- Sodium: 20 mg
- Fat: 22 g
- Saturated Fat: 14 g
- Unsaturated Fat: 7 g
- Trans Fat: 0 g
- Carbohydrates: 35 g
- Fiber: 3 g
- Protein: 4 g
- Cholesterol: 10 mg


Leave a Reply